Julien Delange • Monday, March 22, 2021

AUTHOR
JD
Julien Delange, Founder and CEO
Julien is the CEO of Codiga. Before starting Codiga, Julien was a software engineer at Twitter and Amazon Web Services.
Julien has a PhD in computer science from Universite Pierre et Marie Curie in Paris, France.
Codiga analyzes your code at each code change, either for a new push on your main branch or a pull/merge request that triggers an…
Codiga analyzes your code at each code change, either for a new push on your main branch or a pull/merge request that triggers an automated code review. This is often too late for many users, and they want to catch errors before code is pushed on their repository.
For that reason, we are integrating Codiga Code Analysis directly into the developer environment. JetBrains ecosystem is one of the most powerful for all developers, with products supporting all popular languages. It was natural to integrate with the IntelliJ product suite.
What does this plugin do?
In short: all Codiga Code Analysis results are in IntelliJ, with no need for any third-party tools.
Our plugin surfaces all issues Codiga finds directly in IntelliJ: security, vulnerability, documentation, complex code — you name it. You do not need to configure any additional plugin or setup any complicated third-party tools.
If you are sharing code in a team, that is even better because all developers will have Codiga Code Analysis results directly in their development environment, regardless of their local setup. All you need is this plugin.
How does it work?
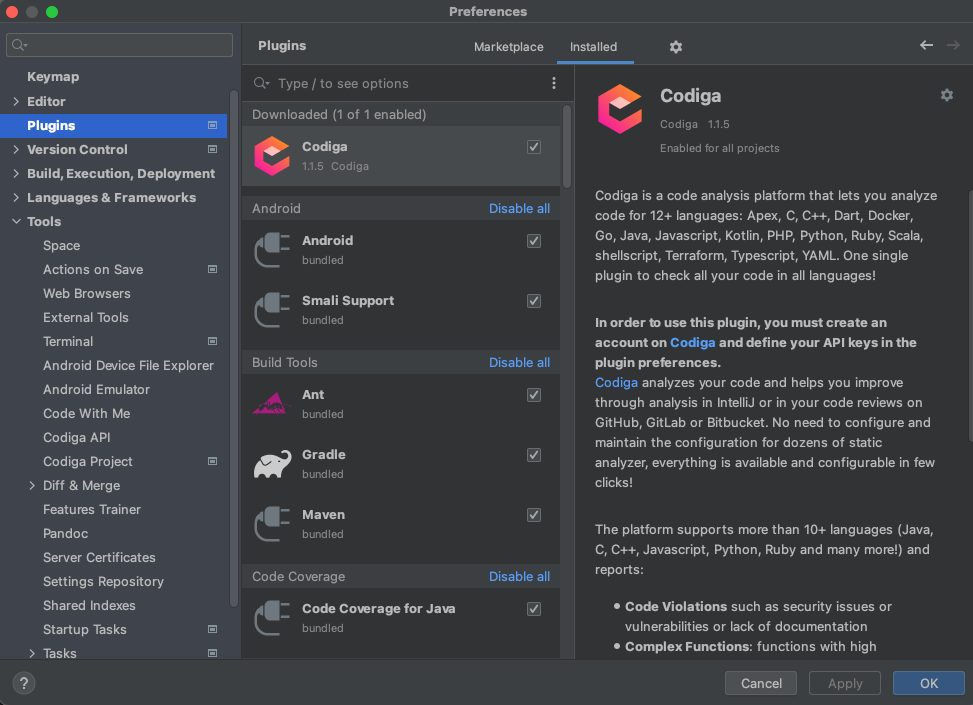
Step 1: Install the plugin
Open your preferences within IntelliJ and look for Codiga. You can install the plugin directly as available on the JetBrains marketplace.
Step 2: Configure your API keys
Go on your Codiga profile and grab your API keys.
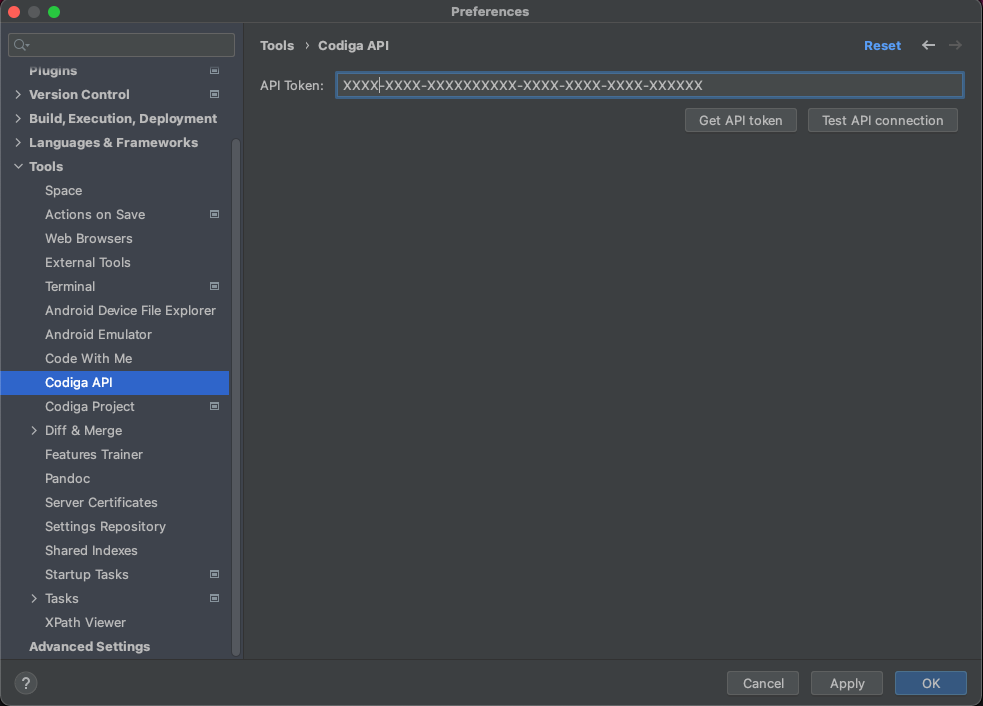
Then, open your IntelliJ preferences, and in the Codiga section, set up the Codiga keys.
Step 3: Configure your project
Open your project in IntelliJ (it has to be the project under analysis on Codiga). In the project preferences, configure the project by selecting the corresponding project in the preferences.
Step 4: Relax!
Relax, all Codiga data is coming in your IDE now!

Caveat and constraints
- Your project needs to be on Codiga
- The current version of the plugin surfaces issue on unmodified code. It does not provide real-time feedback on your code.
- The plugin needs the Git plugin from IntelliJ to work.
Open-sourcing our work
We believe in open-sourcing our work as much as possible. It is natural for us to publish this plugin’s source code on GitHub and release the code under the GPL-3 version. We hope this code will help the developer community and encourage engagement around this integration (in the forms of bug reports, contributions, etc.).
Feedback
If you have some feedback about the plugin, you can:
- Contact us directly via our contact form.
- Fill a bug report directly on the GitHub repository.
Wrapping up
This new plugin is our first step towards better integration within the developer environment. It surfaces all issues for your project, and all your team members have the same issues in their development environment before code is pushed. Finally, this plugin is the opportunity to see our commitment to open source software by publishing its code on GitHub.