Khalid Khan • Tuesday, April 26, 2022

AUTHOR
KK
Khalid Khan, Developer Relations Engineer
Khalid is the Developer Relations Engineer at Codiga. He is passionate about Software Engineering. Startups and Developer Advocacy. He is also an MLH Coach and Organizer & Member to numerous Hackathons & Developer communities
Codiga’s Ultimate Guide to Microsoft Visual Studio Code
When getting started in your coding career, choosing the right tools to be successful is a must. Integrated development environments (IDE) are as important to developers as are created equal. Picking the right one can be a tough choice!
Picking the most suitable IDE for your task is just the beginning, but knowing what tools to integrate with your chosen environment is what will take your productivity to the next-level. At Codiga, we have made it our mission to ensure that all of our smart developer tools can be easily utilized in multiple environments thanks to our plugins. In this article, we’ll be walking you through one of the most commonly used IDEs, Microsoft Visual Studio Code(VS Code), and discussing how Codiga’s Coding Assistant can help you get the most out of this tool to maximize your productivity .
Why Chose VS Code?
As we said, not all IDEs are the same, so understanding the intricacies of each is essential for making the right choice for your project. Basically, VS Code is a source code editor for Windows, Linux, and macOS. Developed by Microsoft, it is free for both personal and commercial use, making it an ideal choice for those getting started in their software development career.
One thing to note is that Visual Studio Code is a lightweight tool and runs on most hardware and software configurations. Like an Apple iOS update, VS Code releases a new version with new features and bug fixes every month. The latest versions of their software are installed as soon as they become available, but please note that you can select to disable these auto-updates if you’d prefer to wait to conduct the updates at your own pace.
Getting started
Getting started with Visual Studio Code is very simple and will depend on your preferred computer program. To begin, download VS Code for Windows, macOS, or Linux. The tool is small in size, so the download should be fairly quick.
Next, double-click the downloaded file, choose Run, and follow the wizard.
While installing, you can choose to install additional extensions, and tools. Some commonly-used components are TypeScript for converting TypeScript to JavaScript, Git for integration with GitHub, and Node.js for running JavaScript applications.
As for code extensions, you can choose from hundreds of them in the marketplace, including the Codiga plugin( but we’ll get back to this a little later in the article).
Before beginning to integrate other tools with VS Code, there are a ton of ways that you can customize existing features to be more personalized to your needs or task.
There are two settings in VS Code for customizations — user settings and workspace settings.
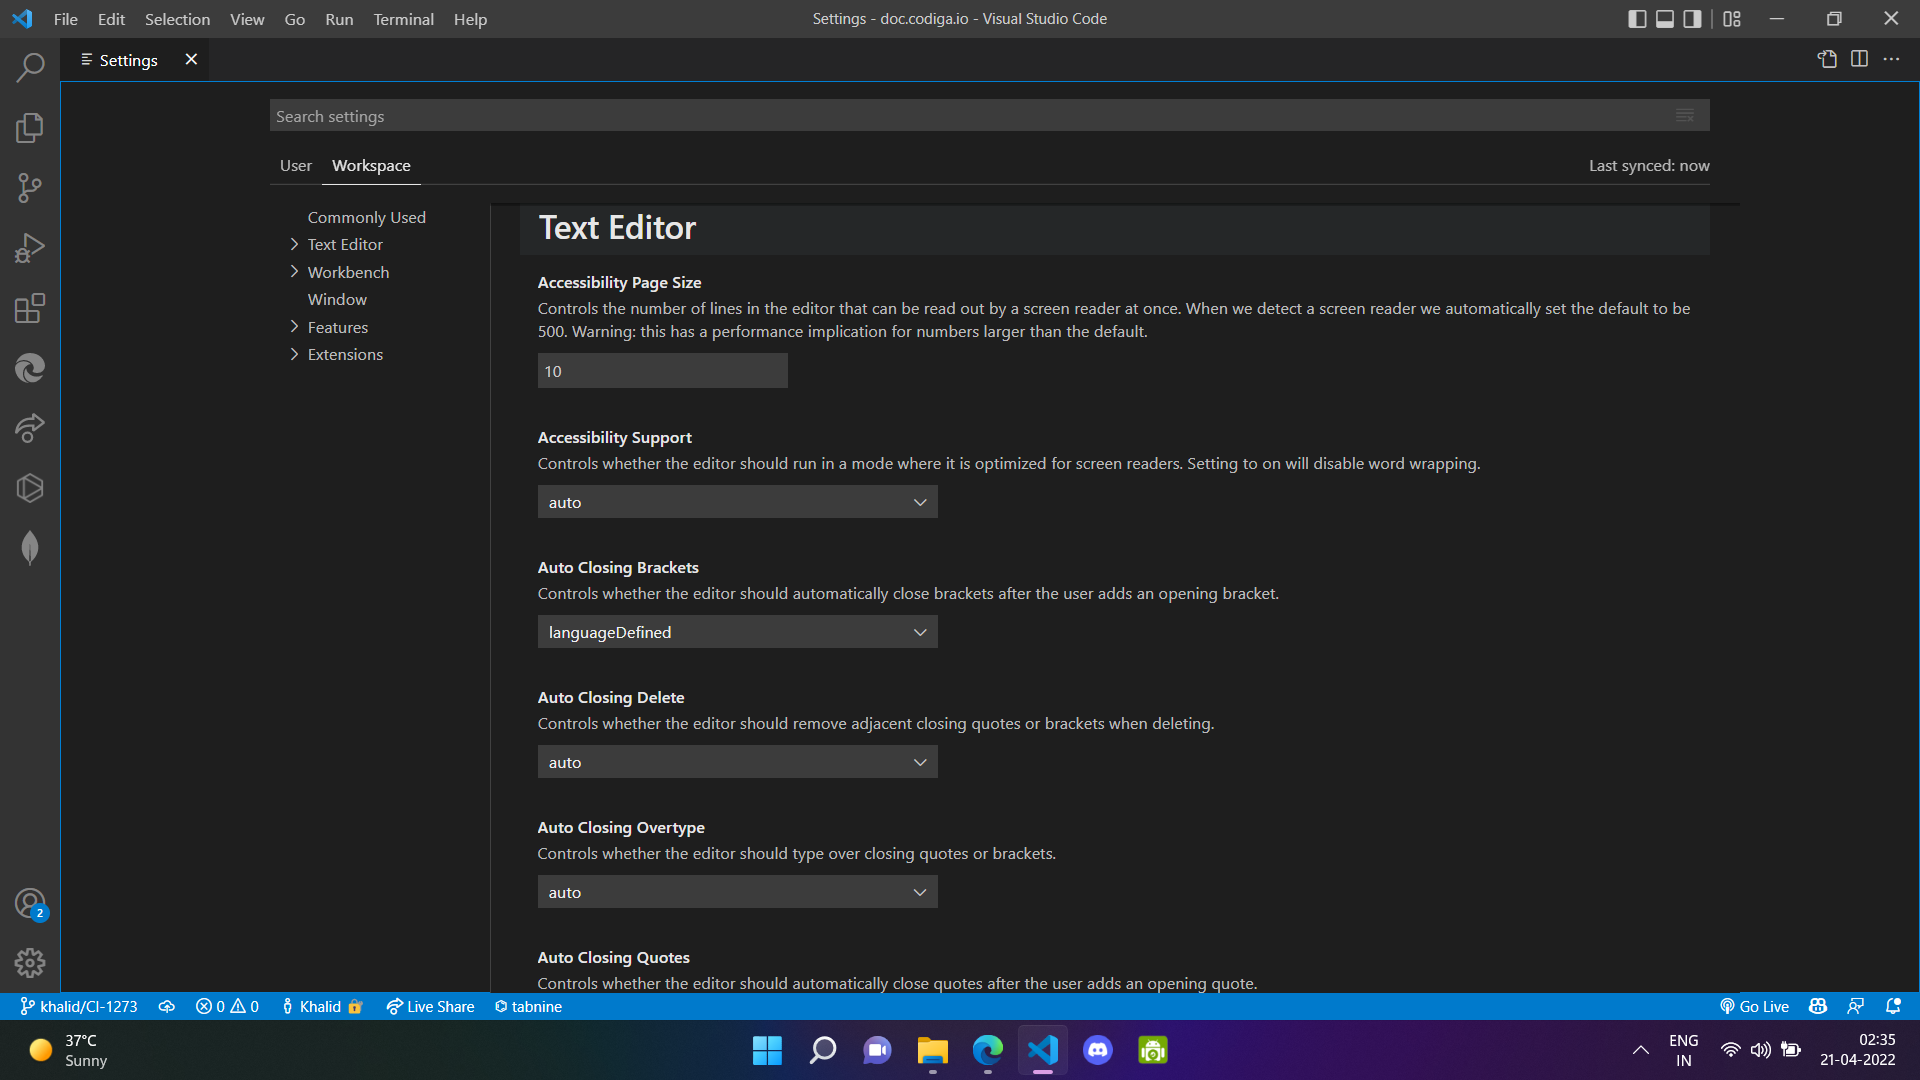
User settings vary as they are customizations that apply to every Visual Studio Code instance you open from anywhere. Alternatively, work settings are customizations of a particular workspace, and these apply only to the specific device where the workspace exists.
Also, what's even more convenient is that these workspace settings are specific to a project and can be shared with others who work on the same task as you. Something to keep in mind is that workspace settings override user settings always.
Viewing and customizing your settings is very simple; go to File -> Preferences -> Settings on Windows and Linux and Code ->Preferences -> Settings on macOS. On the left-hand side, you’ll see a list of commonly-used preferences that you can click on for further customization. Note that you can change language-specific settings as well.
Notable Features
One of the main reasons why VS Code is such an attractive choice for software developers is because it has a pretty awesome suite of features that is constantly growing. VS Code has a user-friendly interface, so making the most of its features, as well as integrating other tools to enhance this IDE even further, couldn't be easier.
- VS Code supports hundreds of programming languages by providing syntax highlighting, bracket matching and more for all the supported languages.
- Has intuitive keyboard shortcuts( more on this in detail below)
- VS Code has an interactive debugger that allows you to quickly go through your code for quality control, check the variables, execute specific blocks of text, and more.
- VS Code integrates well with build and scripting tools to automate common tasks.
- Allows you to customize the editor options based on your own personal preference.
- It’s open-source, meaning you can also contribute to its development
- More on all of VS Codes features here
Shortcuts
Any seasoned developer will tell you that shortcuts are absolutely essential to being a highly productive coder. Once you have set up the user and work settings, setting keyboard shortcuts should be your next priority.
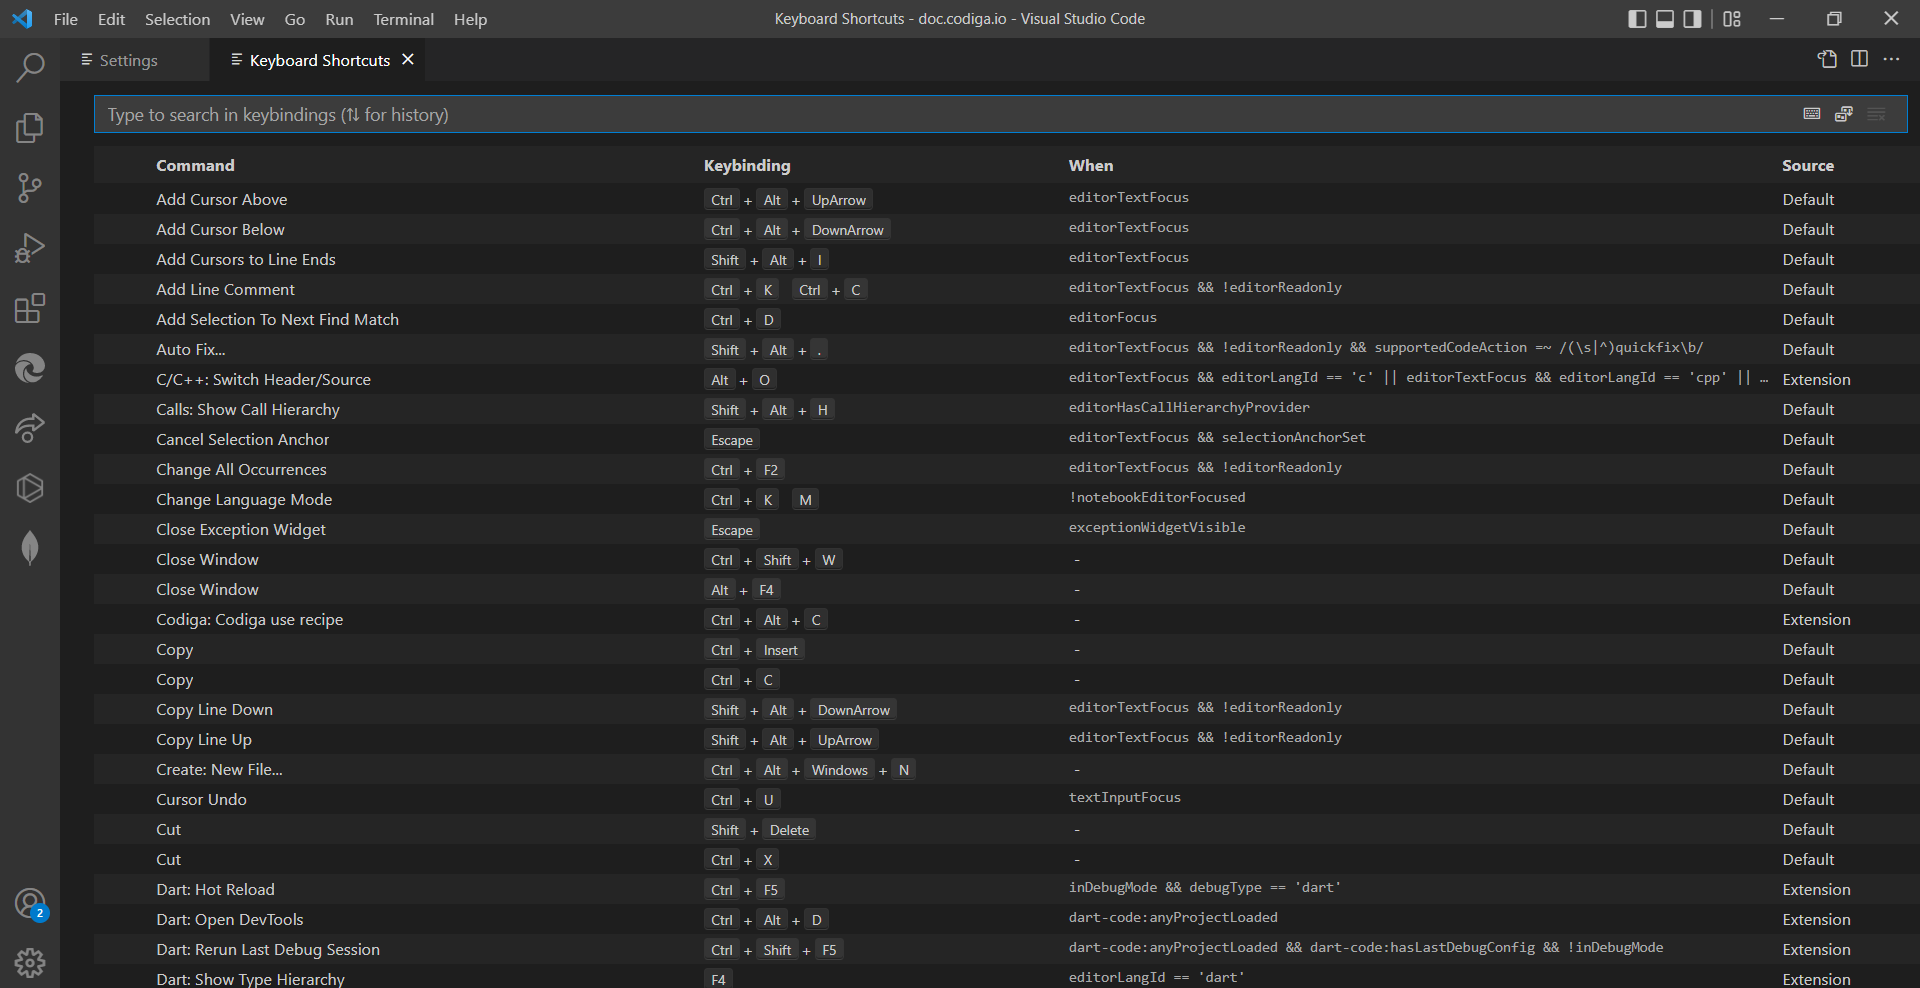
Visual Studio Code comes with a keyboard shortcuts editor that shows all the commands and the keyboard shortcuts affiliated with them.
You can access this keyboard editor through File -> Preferences -> Keyboard Shortcuts in Windows and Linux and Code -> Preferences -> Keyboard Shortcuts on macOS. Though you can make changes to your keyboard shortcuts commands at any time, we highly recommend doing so right at the time of setup so you’re as productive as possible right from the beginning of using this IDE. Lastly, here’s what you need to know about data privacy when using VS Code.
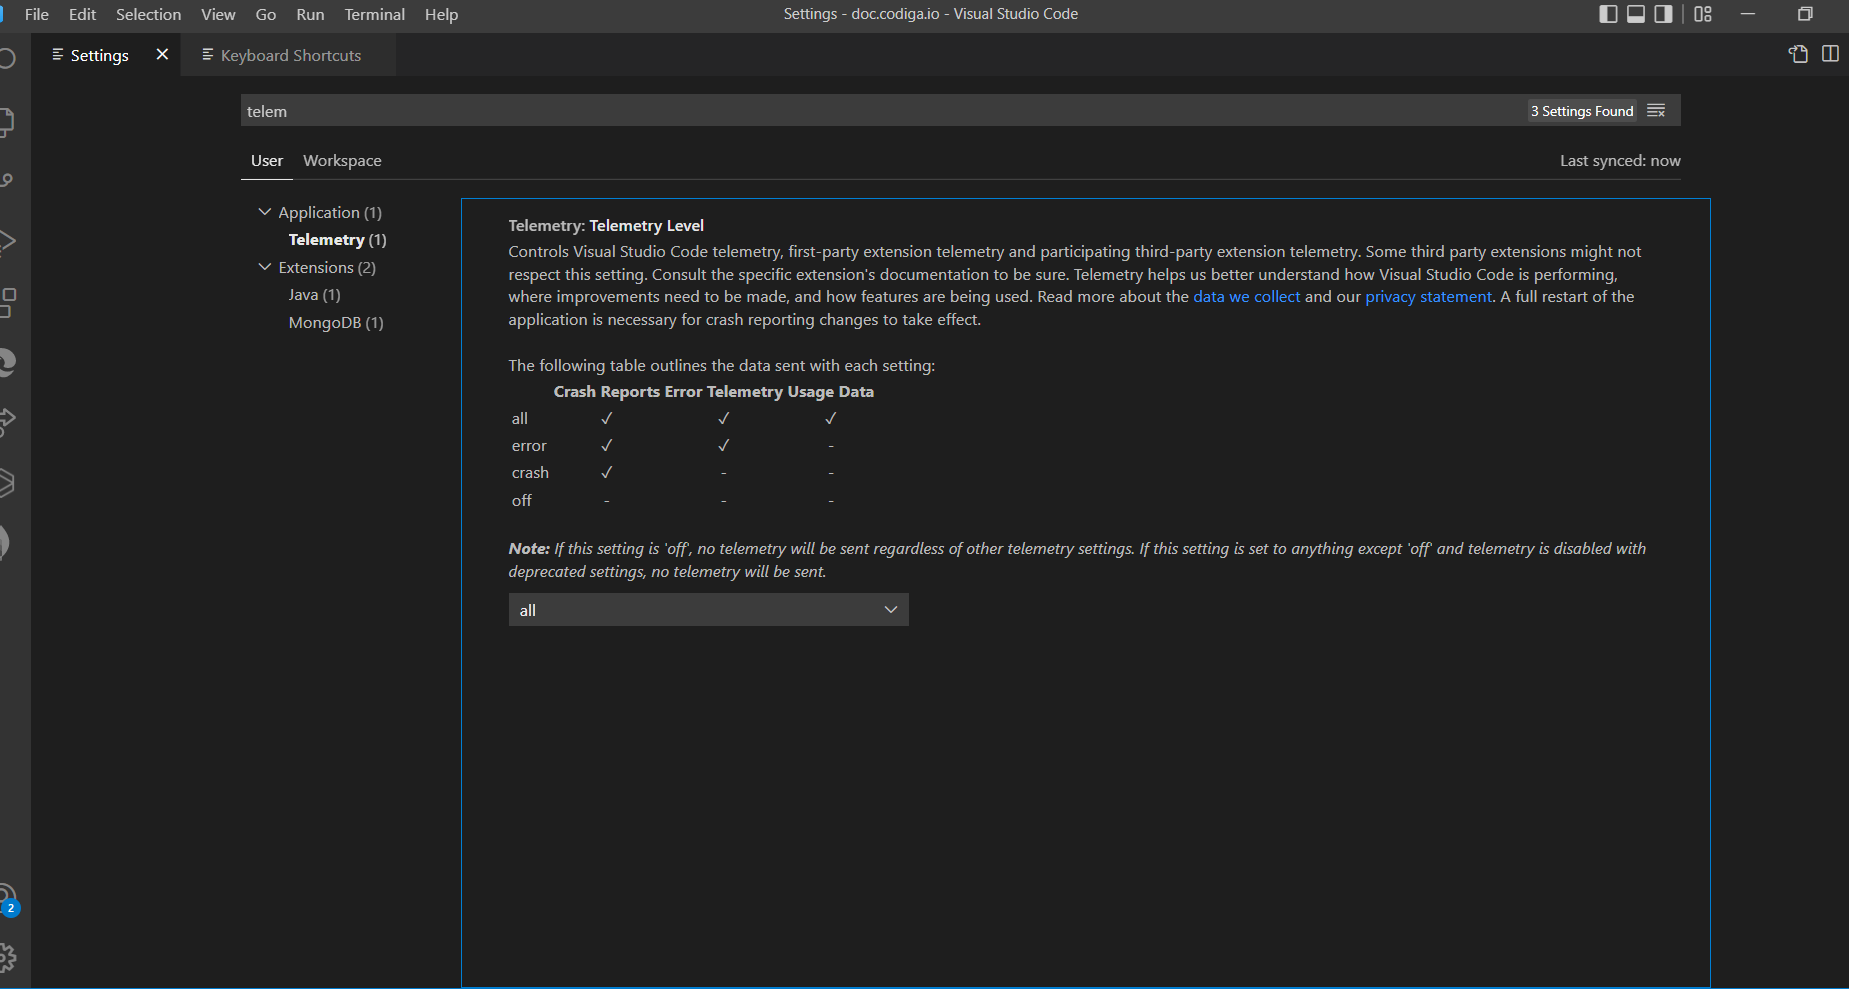
By default, Microsoft Visual Studio Code collects your data to improve its product. But know that there is a way to opt-out and not send updates to Microsoft. To do so,
To do this, go to File -> Preferences -> Settings and search for “telemetry.” Uncheck the “Telemetry: Enable Telemetry.” This will stop Visual Studio Code from sending any further data to Microsoft, though it won’t delete the data that was already sent, so if you want to keep all data private, updating this setting from the start is essential.
Codiga Coding Assistant
Once you have established yourself on VS Code and have learned the ropes of the basics, integrating the right tools that can save you time in the long run should be top of mind. Coding everything you work on from scratch is not only unnecessary, but it can waste precious time that could be better spent on other tasks. That's why we created Codiga’s Coding Assistant.
Using snippets of code to help frame a project is a common practice in engineering– why do work that has already been done by another?
Most engineers typically source these code snippets online or from past projects, which can be time consuming and lead to outdated or defected code. Coding Assistant was created to help developers code ten times faster as it allows you to populate reusable blocks of code in a matter of seconds that have been added by other developers within our network, as well as share your own coding patterns with other users on Codiga.
Coding Assistant can be added to VS Code using our Codiga plugin. This means you don’t need to navigate around multiple IDEs to find what you are looking for, which makes this tool a lot more efficient.
Coding Assistant has many Smart Code Snippets that are readily available to use on the Coding Assistant Hub. Here, you can add them as a favorite to any Smart Code Snippets you like, which means they will automatically populate in VS Code when triggered by name or some keywords associated with the code. On Hub when looking for the right code snippet, you can define search metrics by name or language, or tags associated with the code you are looking for.

Adding your own Smart Code Snippet to be shared publicly, privately or with a designated team takes a matter of minutes, and can be done directly in VS Code!
- Highlight the code you want to share
- Right click
- Select “create Codga Code Snippet” and you’ll be asked to add a name, language, a brief description, and most importantly, the keywords that will trigger a recipe to be populate
- Then, you can select “share publicly, privately or with a team” and once saved, your code snippet will be available instantly to you, or anyone on the platform if you choose to share publicly. Note, we want Coding Assistant to be a give and take environment, so we encourage public sharing of Smart Code Snippets when possible. Note that Codiga never stores your code or data to improve our own product, so you can feel secure knowing your work is helping others in their own development.
Wrapping Up
Whatever IDE you chose to get started in your software development career, know that Codiga’s Coding Assistant can help you take your productivity to the next level. For more on Coding Assistant and our Smart Code Snippets can save you valuable time and energy, click here to get started or chat to us on Discord here.