Julien Delange • Thursday, September 8, 2022
AUTHOR
JD
Julien Delange, Founder and CEO
Julien is the CEO of Codiga. Before starting Codiga, Julien was a software engineer at Twitter and Amazon Web Services.
Julien has a PhD in computer science from Universite Pierre et Marie Curie in Paris, France.
As we recently published our Code Snippets Manager application, we had to find out how to sign and notarize our application for distribution on GitHub and other channels (e.g. Apple Store, Windows Store and Snapcraft).
You can do it locally, but it's a pain, and we want to automate all the boring tasks. We then started to use GitHub Actions to automate these tasks.
We initially used the Electron React Boilerplate template and quickly realized that while this template is useful to get started, a lot of features are poorly documented and offer really few insights when you encounter issues.
We also did a lot of research around when having issues and as usual, it's poorly documented, only works for small applications and do not give you a full walkthrough.
Why do you need to sign your App?
Signing an application proves that you are the real originator/developer of the application. A certificate is issued only after you prove your identity (in other words, it's very hard for an individual to create a fake certificate for Microsoft Corp if they do not work there). Signing an app requires you to get a certificate to sign your app. Nobody can sign an app without having the certificate on their machine (e.g. nobody can impersonate you).
The problem signing solves is simple: imagine you have two programs: slack1.exe (signed by Slack Corporation), slack2.exe (signed by Little Kevin) and slack3.exe (not signed):
- When you open
slack1.exe, the operating system asks if you want to install the application signed bySlack Corporation. It seems legit and you proceed. - When you open
slack2.exe, the operating system asks if you want to install the application signed byLittle Kevin. It does not seem legit and you do not install - When you open
slack3.exe, the operating system warns you that the application is not signed and you should not proceed.
In short, signing your application shows trust to the user that the application comes from a legitimate developer.
Sign your App for Windows
For Windows, you need to get a certificate from an official authority. We took SSL.com to get our certificate. You can take a Code Signing Certificate or EV Code Signing Certificate. We chose the simple code certificate (the first option).
When you sign up, you need to prove your identity (using your scanned photo id, passport, etc.). Once the validation is done, you can then create your certificate.
When creating the certificate, SSL.com generates the private key for you and sends you a complete package encoded by a password of your choice.
DO NOT LOSE THE GENERATED FILE OR THE KEY YOU WILL NOT BE ABLE TO REGENERATE THIS FILE
This key and password will be used later in your CI/CD pipeline (variables WINDOWS_CERTS and WINDOWS_CERTS_PASSWORD).
Sign your App for MacOS
First, you need to enroll in the Apple Developer Program. It's $100 per year and lets you publish your application on the application store.
Then, you need to install XCode and generate certificates:
- Open XCode
- Go to Preferences → Accounts → Manage Certificates.
- Add the following certificates.
Once you have generated the certificates, you need to export them:
- Go to the
Keychain Accesson your Mac - Select the certificates as shown below
- Right-click `Export Certificates
- You will be prompted with a password, DO NOT LOSE THIS PASSWORD
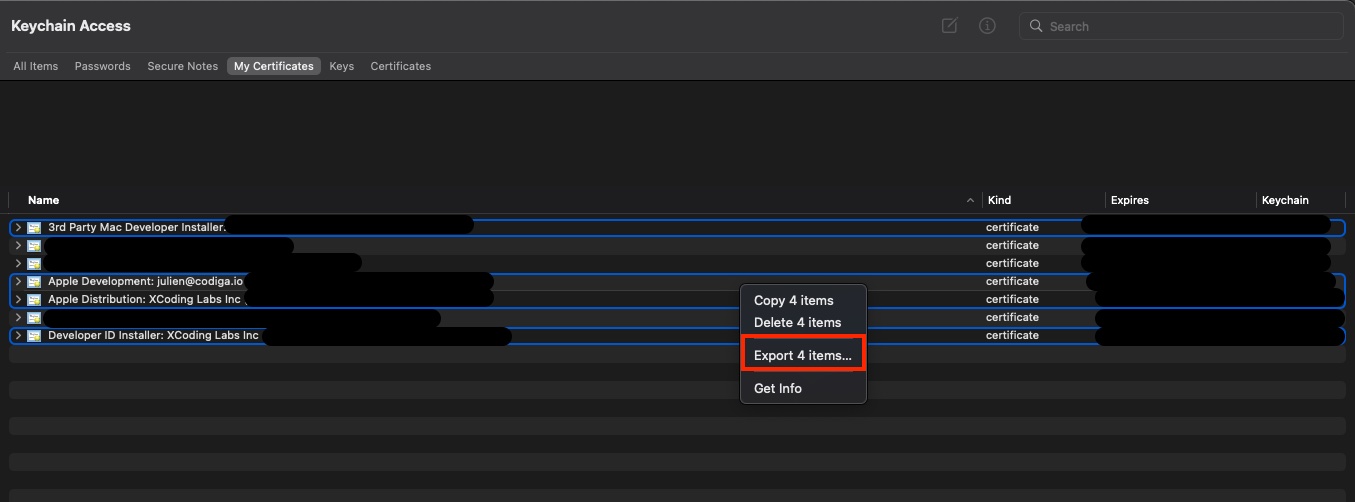
You will get a *.p12 file and a password. You will use this data to sign your code in your CI/CD pipeline.
The .p12 file (encoded in base64) and the password will be used in your CI/CD pipeline (variables MAC_CERTS and MAC_CERTS_PASSWORD).
Notarize your App for Mac OS
Mac applications have an extra step: you need to notarize them. It means that your app needs to be inspected by Apple which will then stamp it for distribution.
To do so, you need to provide your developer id (your login) and your password. You do not want to use your regular password for that and instead create an app password.
To do so:
- Login on appleid.apple.com
- Create an app-specific password
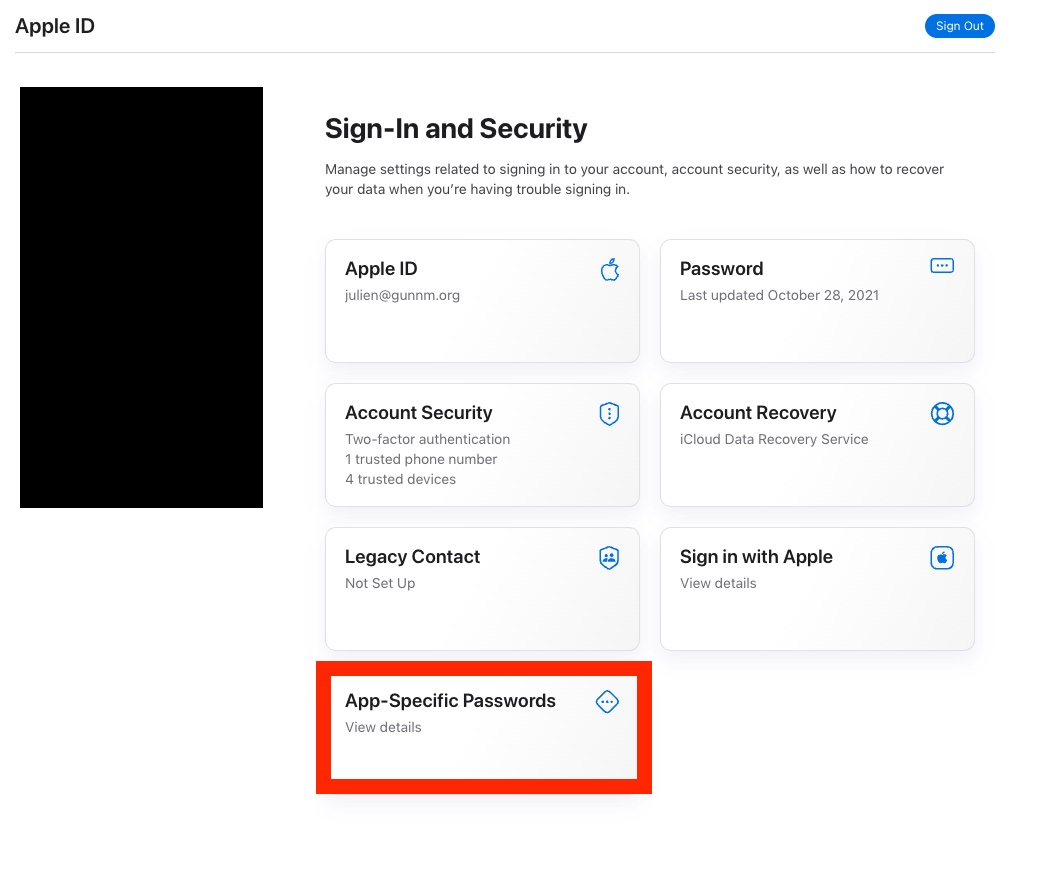
The Apple ID and password will be used as variables in your CI/CD pipeline (variables APPLE_ID and APPLE_ID_PASSWORD).
This app-specific password will be used in your CI/CD pipeline as an environment variable.
Sign your App for Linux
You do not need to sign your app, but to publish on the Snapcraft store, you need
- An Ubuntu One login.
- Get your Snapcraft token
To get your Snapcraft token, you need to reserve the application name and then, use the following command:
snapcraft export-login --snaps <PACKAGE_NAME> --channels edge -
Detailed information can be found here.
This Snapcraft token will then be used in your CI/CD pipeline (see variable SNAPCRAFT_TOKEN).
Integrate into a CI/CD pipeline
We sign, notarize and publish our application using GitHub actions. We use the GitHub Action samuelmeuli/action-electron-builder (see the action here). You can also check our GitHub Action code here.
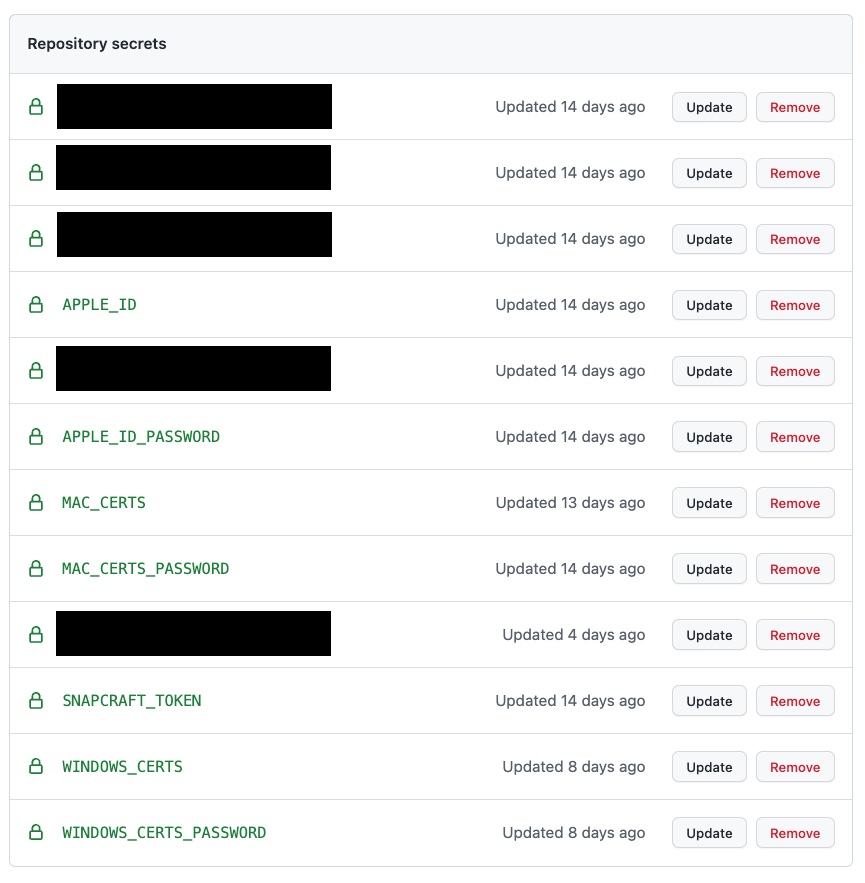
What is really important is to define the following variables:
- For Mac OS
APPLE_ID: the Apple ID connected to your developer accountAPPLE_ID_PASSWORD: the Apple ID password generated for notarizing your App.MAC_CERTS: the certificates you exported and encoded in base64 (base64 -i certs.p12 -o encoded.txton Mac to encode the file and paste the content fromencoded.txt)MAC_CERTS_PASSWORD: the password you used when you exported your certificate with theKeychain Accessapp.
- For Windows
- For Linux
SNAPCRAFT_TOKEN: the Snapcraft token you retrieved before.
Then, call the GitHub action with these environment variables like this:
- name: Build/release Electron app
uses: samuelmeuli/action-electron-builder@v1
if: ${{ startsWith(github.ref, 'refs/tags/v') }}
with:
# GitHub token, automatically provided to the action
# (No need to define this secret in the repo settings)
github_token: ${{ secrets.github_token }}
# We release if the tag starts with v
release: ${{ startsWith(github.ref, 'refs/tags/v') }}
mac_certs: ${{ secrets.mac_certs }}
mac_certs_password: ${{ secrets.mac_certs_password }}
windows_certs: ${{ secrets.windows_certs }}
windows_certs_password: ${{ secrets.windows_certs_password }}
env:
# macOS notarization API key
APPLE_ID: ${{ secrets.apple_id }}
APPLE_ID_PASSWORD: ${{ secrets.apple_id_password }}
APPLEIDPASS: ${{ secrets.apple_id_password }}
Common Errors
Notarization does not work
It can come from two sources:
- The keys to sign the application do not match the account used to notarize the app. Check that you have the correct certificates
- The apple id password is not correct.